Butternut Biscuits with Vanilla Bean Butter

I love a good classic recipe as much as the next gal. Put me in line for chicken with dumplings, chocolate chip cookies and anything else that screams traditional and comfort. But sometimes, it is really fun to play with your food. To be adventurous.

These butternut squash biscuits fit that bill. They take a classic biscuit and transform them into something that is complex yet uncomplicated. The butternut squash provides a nice sweetness and that is enhanced by the vanilla bean butter. Yum!

Butternut Biscuits with Vanilla Bean Butter
Recipe type: side, appetizer1 cup all-purpose flour 1 cup white whole-wheat flour 1 tsp. salt 3 tsp. baking powder 1 tsp. baking soda 5 Tbsp. cold butter, cut into cubes 1 cup butternut squash puree ¾ cup Greek yogurt
Prep time: 
Cook time: 
Total time: 
Serves: 8
 
Ingredients
  • 1 cup all-purpose flour
  • 1 cup white whole-wheat flour
  • 1 tsp. salt
  • 3 tsp. baking powder
  • 1 tsp. baking soda
  • 5 Tbsp. cold butter, cut into cubes
  • 1 cup butternut squash puree
  • ¾ cup Greek yogurt
  • For butter:
  • 1 stick butter, softened
  • 2 vanilla beans
Instructions
  1. Preheat oven to 450 degrees.
  2. In a bowl, combine flours, salt, baking powder and baking soda. Add in the butter and use a pastry cutter or two forks to cut in the butter until the mixture resembles coarse meal.
  3. Add in the squash and mix until combined. Add in the yogurt and mix until the dough forms a ball.
  4. Turn dough on a lightly floured surface. Roll it out until it is ¾ inch thick. Use a 2” round cutter to cut out biscuits until you have no remaining dough.
  5. Place the biscuits on a parchment-lined baking sheet. Bake 10 minutes until golden brown. Serve with vanilla bean butter.
  6. Place the butter in a bowl and use a spatula to spread it out. Using a sharp knife, split the vanilla beans and scrape the caviar out, putting it in the bowl with the butter. Mix well.

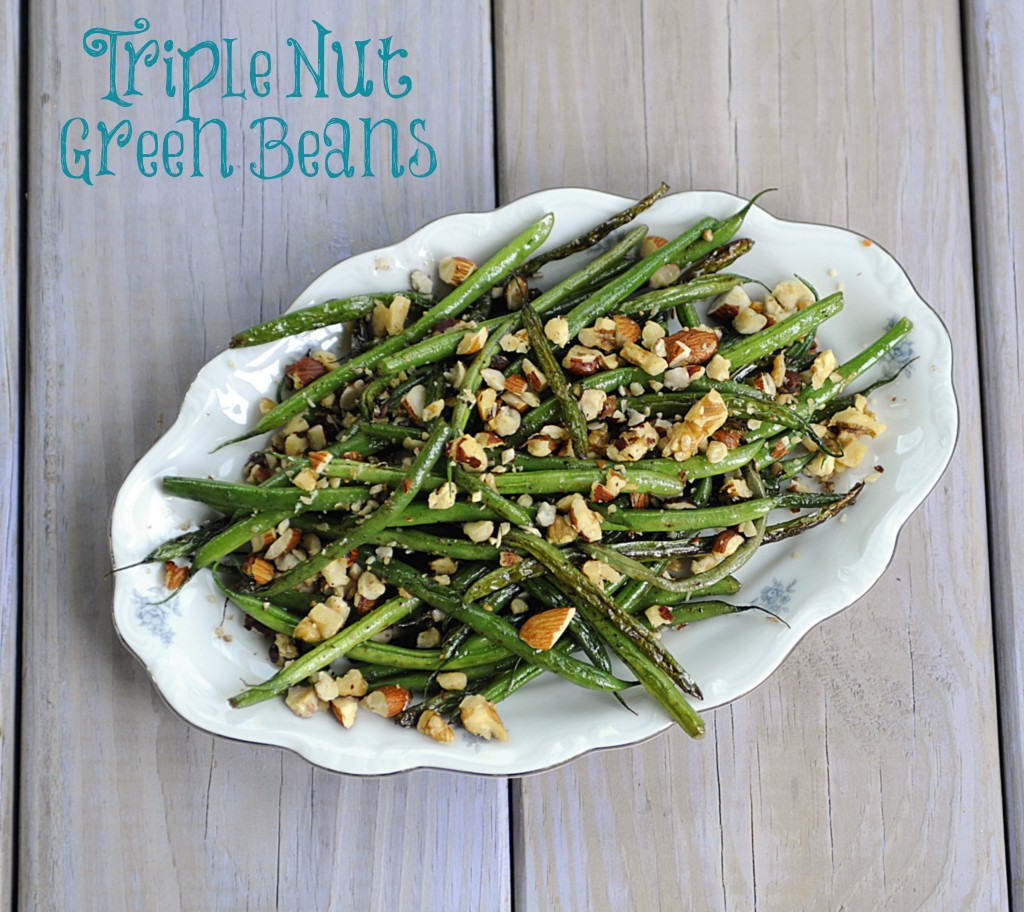
 

Triple Nut Green Beans

It’s not even May yet and I’m already longing for fall. I know, some of you just keeled over, irritated that I’d even mention fall when summer has yet to hit. How could I possibly wish for chilly, biting temperatures when the heat and humidity hasn’t even arrived? Well, I’m a gal who loves fall. I never used to but these days, I long for it all year. I love it when it is here, I miss it when it leaves. There are so many fantastic things about fall. For example: fall farmers market bounty complete with assorted squash, apples, pumpkins and muffins. Temperatures that are chilly but just warm enough to take a walk without a heavy coat. And of course, Thanksgiving.

Since becoming an adult, Thanksgiving is topping off my list as favorite holiday. I used to hate it, simply because I’m not a turkey fan. Now, I love the traditions of Thanksgiving. Waking up early and having a huge breakfast with delicious foods we don’t eat on a daily basis. Watching the parade and freaking out about the next Broadway show I will become obsessed with, then popping in and out for the dog show while basting a turkey. Setting the table with pretty dishes and fancy napkins. When it comes to our menu, we stick to something a bit traditional. This coming Thanksgiving, however, I’m pulling this ace out of my pocket.

Triple nut green beans. It’s a play on standard green beans almondine. I wanted to take that one step further. The green beans are sauteed in brown butter, making them delicious and luxurious. Then, a trio of nuts (in this case, hazelnut, almonds and walnuts) are lightly toasted and sprinkled on top of the beans. I imagine you could use any combination of nuts your heart desires. I love the slighty sweet nutty flavor of hazelnuts and I had them on hand. The crunch of the nuts, the deep flavors of the brown butter and then slightly salty taste of the beans make this a great side dish to any table.

Triple Nut Green Beans
Recipe type: side dish, vegetarian
Prep time: 
Cook time: 
Total time: 
Serves: 4
 
Ingredients
  • 1 lb. green beans
  • ⅓ cup hazelnuts, chopped
  • ⅓ cup walnuts, chopped
  • ⅓ cup almonds, chopped
  • 4 Tbsp. butter
Instructions
  1. Combine all three nuts in a bowl.
  2. Melt butter in a sauce pan over medium heat. Let the butter brown, turning golden with some bits on the bottom.
  3. Once it has browned, add green beans. Sautee approximately 15 minutes until somewhat tender.
  4. Remove to a serving dish. Sprinkle with nut mixture.
  5. Serve hot.


Poppyseed Chicken Salad Bites

Super Bowl Sunday has got to be one of the biggest food holidays of the year. Wings, chips, dip, beer. I myself am known to indulge despite my lack of interest in everything but the commercials and adorable Puppy Bowl show.

A good snack is key to enjoying a holiday mainly based around food and competitive sports. But you don’t need to sit around and eat like a cave man. Wings are great, of course. I could eat my weight in wings. Although why not go for something a little more sophisticated? Serve these poppyseed chicken salad bites if you want to class up your game-day party a little. They pack a flavor punch that will leave you satisfied and not regretting the decision of choosing cute foods over saucy and sloppy foods.

Poppyseed Chicken Salad Bites
Recipe type: appetizer, snack, holiday
Prep time: 
Cook time: 
Total time: 
Serves: 15
 
Ingredients
  • ½ pound chicken breast, cooked and cut into chunks
  • 2 celery stalks, chopped
  • ¾ cup seedless red grapes, chopped
  • ½ cup Greek yogurt
  • ½ cup mayonnaise
  • juice of half a lemon
  • 4 tsp. poppy seeds
  • 15 phyllo cups
Instructions
  1. In a small bowl, combine chicken, celery and grapes.
  2. In another bowl, stir together Greek yogurt, mayonnaise, lemon juice and poppy seeds. Stir well to combine.
  3. Pour poppyseed dressing on top of the chicken mixture and stir to coat. Refrigerate for at least an hour.
  4. Lay phyllo cups out on a flat surface. Using a teaspoon, scoop about 1 teaspoon of chicken into each cup.
  5. Serve cold.


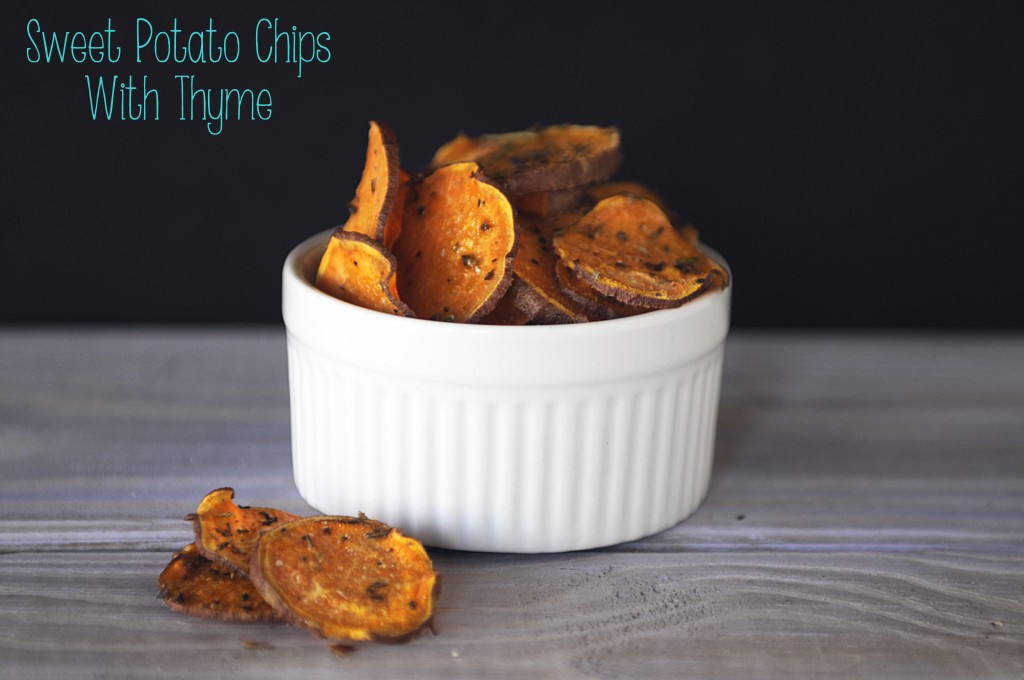
Sweet Potato Chips with Thyme

By this time, everyone is well aware of my undying love for both sweet potatoes and salty snacks. I’m a self-confessed junk food junkie and while I wish that would stop, it won’t. Chips, cookies, candy, chocolate, fruity snacks. They call to me. Really. I’m ok at avoiding the impulse buy at the grocery store but still… I go to the cafe at break time for a glass of water and the chips press their crinkly, shiny bag up to the vending machine glass as if to taunt me. It’s a sad, sad world where chips tease you.

I’ve never been known to turn down a salty, crispy potato chip and so, it makes eating healthy, making new lifestyle choices, losing weight all very challenging. I could be skinny if I just cut all of my ties with junk. In the meantime, I just try and make better choices. TRY. Not always succeed but you know, oh well. Either way, I find these sweet potato chips to be a really decent alternative to standard fried chips. They may even be, dare I say, better?! Really. I think they are. They’ve got a little sweetness to them that I love. And they’re still salty enough to satisfy my cravings. Plus they are baked so I can eat a ton and not feel completely guilty.

5.0 from 2 reviews
Sweet Potato Chips with Thyme
Prep time: 
Cook time: 
Total time: 
Serves: 4
 
Ingredients
  • 1 sweet potato, thinly sliced
  • 2 Tbsp. olive oil
  • 1 Tbsp. orange zest
  • 1-2 tsp. freshly chopped thyme
  • Salt and pepper to taste
Instructions
  1. Preheat the oven to 400 degrees. Line a baking sheet with aluminum foil.
  2. Combine olive oil and orange zest in a small bowl. Using a pastry brush, brush half the olive oil mixture onto your baking sheet.
  3. Lay your sweet potato slices onto the baking sheet. Brush the potato slices with the remaining oil.
  4. Sprinkle thyme evenly on top of your potato slices.
  5. Roast in the oven for 20 to 25 minute until crisp.
  6. Sprinkle salt and pepper on top to taste.


Cheddar Tater Tots

Ever since my first experience with homemade tater tots, I’ve been on a serious kick. I want to make them and eat them all the time. I guess it is the kid in me coming out. Either way, homemade tater tots are totally awesome.

We had some for lunch over the weekend after a morning of serious cleaning and grocery shopping. What can I say? We needed the nourishment. I added in some cheddar and they absolutely hit the spot. Even though it made a huge serving per person, I could have eaten more. Tater tots are seriously dangerous. Tater tots loaded with cheddar cheese are even more dangerous. Be aware, you’ll devour.

5.0 from 1 reviews
Cheddar Tater Tots
Recipe type: snack, appetizer, breakfast, kid-friendly, vegetarian
Prep time: 
Cook time: 
Total time: 
Serves: 4
 
Ingredients
  • 3 russet potatoes, peeled and chopped
  • 1 cup cheddar cheese
  • ½ cup flour
  • generous salt and pepper to taste
  • oil for frying.
Instructions
  1. Preheat oven to 375 degrees. Line a baking sheet with foil and set aside.
  2. In a food processor, slice potatoes into thin slivers. You can also grate them if you choose but I am far too lazy for that. Transfer the potatoes to a large towel. Wrap the towel around all of the potatoes, hold them over the sink and squeeze like a sponge to rid the potatoes of all their moisture. Transfer the potatoes to a bowl.
  3. Add the cheddar cheese, salt, pepper and flour to the potatoes and mix well.
  4. Heat about ¼ to ½ inch of oil in a frying pan over medium high heat.
  5. While the oil heats, form your tots. Take a large teaspoon full of potato mixture and mold it into a tot shape.
  6. Drop the tots into the pan and fry them until golden brown. Flip and repeat with the other side then transfer to a paper towel-lined plate.
  7. Once all finished, transfer the tots to your baking sheet and bake for about 10 minutes. This will ensure they are completely cooked through and will be very crispy.
  8. Sprinkle with salt and serve hot.